Translate this blog....

Showing posts with label Review. Show all posts

Sunday, October 22, 2023

**REVIEW** La Roche Posay Toleriane Hydrating Gentle Face Cleanser

 I can't believe that I forgot to post this review (it's been 7 months since I started using this) so I am going to do a quickie...

The cleanser is, no doubt, the most gentle one I have ever used. It's even more gentle on my face than the oil cleansers I've loved. The best thing about this is that as gentle as it is, it cleans like crazy. 

The first time I used the product, I over-used it. I thought that because it felt so creamy and gentle I needed to use more. Also, the cream does not produce any foam. Bottom line: it only takes a small amount of the product to clean my entire face really well. And, as well as it cleans my skin, it doesn't dry it out. I don't have to make a mad dash afterward to apply a moisturizer. 

As with other LRP products, this one has a really good list of ingredients. There is no scent - another plus - and the texture is so lux that I feel pampered. And, for such a good product, I am surprised at the affordable price (about $17 for almost 14 ounces of product). It only takes less than a nickel-sized amount of the cream to clean my entire face. I have plenty of product left and I've been using this bottle for over 7 months.

Look at what's not in this product

By now, I have tried a few LRP products - the Cicaplast, the Double Repair with UV Sunscreen, and the Lipakar lotion. I really like the moisturizers except I do prefer Neutrogena's sunscreen over the LRP Double Repair, but I am sticking with this cleanser. 

This cleanser has an expiry date of 2025 and the way it lasts, I might still have some then!

Check out the ingredients

There's not a lot else to say about this. It feels great and doesn't irritate my grouchy, bipolar skin. Have I mentioned that it's odorless? It is and I love that.

Peace

--Free


P.S.: Believe it or not, this cleanser is currently cheaper at Amazon than at Walmart! Walmart seems to have it marked down from $25 to almost $19 currently. Amazon still has it for the $17 price that I paid months ago. Make sure to check the official LPR site though. I see that they have subscription prices.


Tuesday, January 31, 2023

**REVIEW** Embryolisse Lait-Crème Concentré (Hidden Beauty Gem)

 Those beautiful French women have been holding out on the rest of us! I see you, Marciella!

As you all know, I have been going through a cycle of trying-loving-ditching face moisturizers. Mama did not tell me that my skin was going to go through this many changes as I age...

For the record, I am still using my homemade goat milk-glycerin lotion as my go-to body moisturizer. I am still using German Nivea as a night face cream and foot cream. But, for taking care of my aging (dry, sensitive, and tap-dancing on my last good nerve) facial skin, this is what I have landed on. 

I love this Embryolisse Lait-Crème Concentré and still have to Google how to pronounce the name. Shut up. (BTW, it sounds like  "om-bree oh-leese lay crim". You're welcome.)

I'm sure that in 6 months or a year, my skin might do an about-face and possibly need a change-up but this stuff satisfies all my facial skincare needs - including price. And we all know that for my broke self, that price is the deal-breaker.

Here is what I like, love, and crave about this:

  • The texture. It's like a wet cream. It's light, non-oily, not thick (or too thin), and very spreadable.
  • There is no scent. 
  • The first ingredient is water.
  • The main ingredients (other than water) are shea, beeswax, aloe, and soy.
  • It's affordable at $14 a tube. (And a dot the size of a baby aspirin treats my entire face.)
  • It's not made in China.
  • It doesn't break out my skin - nor make it shiny.
  • It makes my skin feel supple & it immediately soothed it and cleared up any dryness.
  • It's multi-use & can be used on the face & body; as a mask; as a makeup base & remover; and as an aftershave.

It's been since before the pandemic that I've even thought about wearing makeup. If I'm feeling pippy, I might put on some lip gloss. To be honest, I was thinking about getting a tinted moisturizer though because my face has been so dry and dull-looking. The Nivea and my oils work to make my skin feel better but I'd lost some of the natural natural-ness if that makes sense. 

I'm not mad. That's just my regular face!

About two days after I started using this, I noticed that my skin was looking back to its old self - "old self" as is healthy, not as in "I'm 30, y'all!" I mean, this stuff is good but it's not magic!

In addition to what this does for my skin, I have to add that I'm impressed with how well-packaged the product is. It's been a long time since I've used a beauty product that was very clear and detailed about ingredients and manufacturing. Our French brothers and sisters are on to something.

Anyway. Unless something drastic happens, you all won't hear me talking about another "holy grail" moisturizer for a long while because I did a subscription to this.

So now, I have this, my oils &  homemade goat milk body lotion, and the Nivea for my feet. I'm done.

Peace
--Free


By the way, unlike the TikTok and YouTube folks who tout "holy grail" products, I do NOT get paid, sponsored, or compensated in any way for the items I review. I don't even have an Amazon page that I link to for affiliation or compensation. So there.

Bottom line: I only review products that I actually buy & use. #just saying.

Monday, December 05, 2022

**REVIEW** COFFEE - Lavazza Gran Selezione Dark Roast

 I'm still trying to find my regular coffee groove. Lavazza is a brand I've been seeing on Amazon for almost as long as I've had a membership. Finally, I broke down and gave the Gran Selezione a try.

"Intense and chocolaty"
their description

The coffee is not bad at all and the price is great. It comes in a 12-ounce bag and at $0.53/oz is less than 7 bucks a pop on a Subscribe and Save plan. I tend to write really detailed Amazon reviews but I kept this one short:

"This is a great price so I'm not mad. The flavor is not as "dark" as I'd like but it is good coffee. I do make it "Euro-style" (measuring by grams and milliliters instead of tablespoons & cups) and that helps boost the flavor.

I can smell them but only taste a little bit of the chocolate notes. The price, the price, the price is what will have me buying this again. I mix it with some of my other coffee that is more expensive to add flavor & save money."

Y'all know I am long-winded so for me to do such a short review kind of says it all. The coffee had me at hello with the price but I wasn't sure at first about a long-term relationship. I might end up doing a subscription just because I am tired of looking for something affordable...

Anyway.

I have been drinking the Lavazza every day for about 2 weeks now and it's growing on me. It is kind of  "chocolaty" but not that "intense". However, every time I look at the prices of other coffee, this one looks better and better. I have one more coffee to try before I give up. The next coffee I'll be trying was bought with a gift card but the non-discounted price is $1.18 an ounce so... that's going to have to be some really good coffee to win me over.

The thing with the Lavazza is that I really do have to measure the coffee out at 2 tablespoons (24 grams) for every 2 Ninja-size cups (or 360-370 milligrams) of water to get the best flavor. The bag doesn't last long at the rate that I drink coffee. This is why I need something at a better price.

When I get the Lavazza made perfectly, it's really good. It has some of the dark chocolate "bite" to it that I love in a dark roast. It's just not a true dark roast if that makes sense. It's like the Kid & Play of coffee where I prefer some Public Enemy strength java.

Unless I love (and can afford) the next coffee, the Lavazza will be my steady while I cheat every now and then with Jim's Sweet Love. They're both Subscribe and Save items so I can get the Lavazza monthly and the Jim's every three or four months.

I've already got plans for when I decide on a regular coffee. Every year, the nieces & nephews ask what I want for Christmas. I was going to ask for one of those little Bissell carpet cleaners. Instead, I'm asking for a set of airtight coffee canisters. 

What does that tell you about my priorities?

Coffee snobs will laugh but what I wish is that I could find Yuban Dark Roast on a regular basis.

Yuban survived the Civil War

The Yuban I've found lately is not the lovely Yuban it used to be (or the lovely Canadian Yuban of today?) but, if I make it just right, it is still the best coffee for the price. And I'm not exaggerating when I say that I have some 2-year-old Yuban vacuum-sealed in 1/2 cup amounts and stored away that still tastes great. I always open up one of the little pouches of it when I'm waiting for my other coffee to ship.

When I try my gift-card coffee, I will, of course, write up a review here.

Peace

--Free

Wednesday, November 30, 2022

**REVIEW** ProFoot Original Miracle Insole


This is the short version of this review for Profoot Original Miracle Insole:

Pros: 

  • Very lightweight & thin. Won't cramp your toes or alter the fit of the shoe as much.
  • Good for heavier-weight people (I can testify to that!)
  • Affordable. Around $10 when I got them on Amazon. Might be cheaper at Walmart.
  • Work to make the hardest-soled shoes comfortable & great for combat-style or workboots.
  • Size variety (with trimming) are for U.S. women's size 6-10 & men's 8-13. (If men need smaller, just get the women's version.)
Cons:

  • None that I know of after a week but I don't know how long they last.


Now, my long-winded rant and the review!

I needed new winter boots. I bought new winter boots. The boots are cute. They are exactly the right color and style I was looking for. And they were very affordable. These are the boots.


Everything about these boots is all that I love in a boot. Except for the insole.

The minute I tried these on, I knew I had a problem. The insoles made it feel as if I was walking barefoot on concrete. 

Like with apparel or footwear that I get from Amazon, I chose the Try Before You Buy option. I'm really awful at shopping for clothes and shoes online. Nothing ever fits the way I expect. The sellers' ideas of sizing vary so much. I've sent back more clothing than I have ever owned. I think out of the past 3 years, I've only kept two items. These boots were NOT going to be the third.

But I really really liked the boots and I could actually afford them. I decided to see if I could make this work out for me so I went hunting for a good insole option.

In the past, I've usually gone with Dr. Scholl's or one of the other brands of insoles that I could easily find. This time, I wanted to be sure to get the best without going broke. Finally, I found these:


The insoles cost around $10 and I was mad at those boots because I was out more money. Then when I took the insoles out of the package, I was even madder. They look so thin. And they have a cheap and papery feel to them. I just knew I was now going to be returning both the boots and these insoles. 

Still, I figured, it wouldn't hurt to try them out. I decided that between the built-in insoles and these, maybe, just maybe, I would be able to wear the boots without being in pain. So I gave it a try. I didn't have to do any trimming because I'd gotten the boots in the size 9 (women's U.S.) that Amazon suggested. I normally wear an 8.5 but, like I said, you can never really tell how things will really fit.

Anyway. I took a walk around the living room. Then I took a long walk down the hallway outside my door. Both those surfaces are carpeted though because I wanted to be able to return the boots if I needed to. But I wanted to see how they would feel on hard surfaces so I went down one of our halls that has hardwood flooring (it was freshly mopped and pretty clean). The verdict:

Let me tell you something! These insoles are a-ma-zing.


My boots now felt like they should have in the first place. I have a pair of more expensive and better-made boots (that I save for better occasions) and these cheap, man-made boots now felt just as good.

The thinness of the insoles that I'd been so worried about is actually a bonus. Most insoles that have worked for me in the past take up too much room in the footwear. These just cushion the foot without cramping the toes. It probably helps that I got these in a 9 but they had already fit with my winter socks (and I got these for winter so I don't ruin my better boots). 

The big test of these insoles - now that I'd decided to keep the boots - was when my SIL and I went grocery shopping and ran some other errands. We did some lightly iced-over concert parking lots, we did wet concrete, and we did those hard floors in Walmart and a couple of other grocery stores. The comfort level was great. 

So, there you go. If you need some good insoles, I can suggest these. 

As for the boots, I don't think that I would buy more from this brand unless I was totally in love with the look. For one thing, when you pull these up in the Amazon search, they show the vegan materials as "leather". That's a blatant and bald-faced lie. Vegan materials are not leather and should be described accurately as being man-made. On the other hand, you probably can know that boots in a certain price range are not authentic leather. But it's a matter of product honesty. Also, if all their boots are as uncomfortable as these were, I can't trust their "Memory Foam Insoles" claim any more than I can trust their claims of the shoe being "leather". But this pair is super cute.


Pro-tip: If you find boots online that are out of your price range, do an image search and try to find those boots on Poshmark or Mercari, or eBay. I found the leather pair that I originally wanted on both Poshmark and eBay - just not in the size I needed or the color that I wanted. 

Peace

--Free


Monday, November 28, 2022

**REVIEW** Thirteen Chefs Cutting Board/Space Maker

If you have a tiny kitchen (as I do) or live in a camper, van, etc., and need to make more counter space, you must check out the Thirteen Chefs Cutting Board

My kitchen is, as my Mama would say, too small to cuss a cat in. I have no idea where Mama got the saying but it means really, really small, aka, my kitchen.

I looked, off and on, for over a year and just couldn't find anything (affordable) to give myself more cabinet space. Most good cutting boards are pricey and the extra-large ones are ridiculous. Except for this one:

30 x 18 x 0.5
I just wanted to show how it fits across the double sink area.
(Excuse my messing baking area in the photo!)

The boards come in 4 sizes and there are up to 6 color choices - depending on which size board you select. At the time I ordered mine, the size I wanted only came in white, which I like for the kitchen. With white, you can see how clean or dirty something is. 

I don't use this as a cutting board. I use mine as a space maker for when I'm baking. I can place the board across my double sink (as shown) and that gives me room for kneading and rolling out dough.

It is really sturdy. I keep it from sliding around by putting a damp dishcloth under the sides. The board holds up even when I'm kneading dough or slamming it down on the board. My neighbors probably hate me when I do that, but that board holds up like a champ!

I can push crumbs and things right into the sink

Later, when I'm washing up a ton of pots, pans, and bowls, I place the board across the stove to use as a dish-drying rack. Mostly, I use it when I'm baking. Before, I had to put my mixing bowls and baking tools on the dining table (which is in my carpeted dining-slash-living room) so that I could use the kitchen for the hot pans and the stand mixer. Such a hassle. With the board, I get 30 x 18 more inches of space without having to run from the kitchen to the living room and back.

The board is also great for use as a cooling rack because it's "heat resistant" up to 180F. I never put scorching hot just-out-of-the-oven bread pans directly on the board but I do use it to hold other cooling racks. 

It's not as hard to wash and clean as I worried about. Although it doesn't fit in my sink, I can hold it up and at a slant in order to scrub it down with soap and rinse it. It's not that much of a hassle. The only hassle I had was with finding somewhere to store it...

When I'm not going to be baking for a while, I keep it on top of the overhead cupboards. No problem. However, when I'm in a baking mood and making something every several days or so, I have to keep it behind the bookcase that I made into a pot/accessories storage.

It's resting on a thick piece of 
plastic
Taking it from behind the case and washing it down is a hassle but not as much hassle as using my dining table.

Now, here is the very best thing about the board: it was only $35 when I bought it a few months ago and is worth every copper penny. I see that the jumbo size I got is not currently available - probably it sold out during holiday sales. When I was looking, any decent size over 20 inches was running from $60 to over $100. I don't even remember how I stumbled over this one.

Anyway, if you are looking to make more counter space, this is a great buy. And, nope, I am not being compensated for this review. I just like sharing when I run across exceptionally good buys.

Peace

--Free

Saturday, November 19, 2022

**REVIEW** Zinus 12 Inch Green Tea Memory Foam Mattress

 Since I cannot update the Amazon review for this, I figured I'd make this post.

I got this bed over 5 years ago when I moved here. It's the best mattress I have ever slept on - better than in any luxury hotel or some wealthy person's home I've spent time in. This thing is still as firm (not hard) as when it was brand new. It's a green tea memory foam mattress.

It actually did arrive like this! The instructions were to unroll it and let it "decompress" for 1 to 3 days. Yeah, well, I'd been sleeping on a pallet of blankets for over a week. I let this sit open for about 16 hours before I had my family set it up on the frame!!!

The Zinus frame 
now costs as much as the bed did.
I paid about $90 at the time.

By the way, I really do love this frame. It's minimalist and sturdy. And sits high enough that the bed linens don't (usually) touch the floor. One of my nephews even made up the bed for my first night in it...

I don't think I just went to sleep. It was more like I lapsed into a kind of semi-comatose state of bliss.

Every now and then, I will take a peek at what other queen-sized mattresses cost and the prices are ridiculous. This one was a steal at under $200 (lightning deal or something) and is still a great deal at the current price of around $350.

A couple of things about this mattress:

  • You can't flip it - well, you can but you're not meant to. The mattress is encased in a nice, thick zip enclosure that is not meant to be removed and is made to sort of velcro to the frame. The flipside is much more firm (almost too firm) and I know because I tested that out. At any rate, I don't need to flip it. I simply rotate it every now and then because I tend to sleep to one side of the center. #singlelifeprivileges
  • At 62.5 pounds, it's much heavier than any "regular" mattress I've owned. Every time I rotate it, I count it as 2 days' worth of exercise.
  • I learned from experience that the mattress has good "motion isolation". Other than sleeping, I do almost every stationary thing sitting on my bed - writing, reading, and watching videos. I have a wooden bed table where I sit my computer and cup of coffee. I can almost jump on the bed without spilling that coffee.
  • The foam definitely has good bounce-back or shape recovery. After sitting on one side for a couple of months, I can rotate the mattress and the "worn spot" recovers its original shape and firmness.
  • The "tea" part truly does work to keep the mattress fresh. I'm not a stinky person but a regular mattress will hold odors from normal night sweats and other normal body residues. 
  • I'm not sure if I buy into the claims that the green tea infusion helps sleep. I think I rest better overnight because of my comfort level on this mattress. Who really knows?
I spent more money on the mattress and bed frame than any other furnishing when I moved here - and I got them both on a huge sale. I mean, people, I have a futon sofa sleeper! Cheap, cheap, cheap. But like I said, I use my bed more than any other furniture. This was such a worthwhile purchase. When I got them, as I said, I'm sure they were on sale so I paid under $300 for both. I don't know if it will qualify as #BIFL (buy it for life) but it's definitely a buy it, buy it, buy it.

If God is willing and I'm living in another 5 years, I will do an update.

Peace
--Free

P.S.: No, I am not being paid for this review. I wish!

Tuesday, November 15, 2022

Mama Cozzi's Pizza Kitchen Pizza Dough

 Since Aldi is so much cheaper than the local Hyvee (and I mean so much cheaper!) it's my preferred Instacart store. Of course, Walmart is also cheaper than Hyvee and has a wider variety than either Aldi or Hyvee in every department. What Walmart does not have is a frustration-free membership program...

Anyway, I love my local Aldi store and have ever since I discovered their core brands. I'm not crazy about their line of coffee creamers but the ground coffee's not bad at all. It's the coffee that I keep around for any visitors who are not as picky about their java as I am. But the Aldi brand I love the most is Mama Cozzi's Pizza Kitchen.

If you have never tried one of the MCPK take-and-bake pizzas, you may have heard not-so-great things about them. But, if you use a few tricks when baking the pies, you have no idea what you're missing. When I went through a period of the blues, I would order a couple of those to have around. I would only fix half or a 4th of pizza at a time (the 16-inch pizzas barely fit my oven and done fit any of my pizza pans). 

As I said, you have to put a little spin on the basic baking technique with these pizzas. Personally, I like a crispier crust and bottom to my pie. I will sprinkle a little Italian seasoning and maybe some bacon bits on top of the pie, then oil the baking pan and the pizza crust with a little EVOO before baking. I find that EVOO works better for a crisp and chewy crust than I get when using butter.)  I'm having flashbacks of joy just thinking about it.

To be honest, though, because they are so huge, the take-and-bake pizzas are a little much when I'm not battling the blues. Having a much smaller option is possible if I make my own. Have you ever made pizza dough? I have and it was a nightmare. It's supposed to be so easy but... I can bake bread so I'm not sure what my problem is with pizza dough. By the time I get the dough ready, I'm out of the mood for the pizza. Well, Mama Cozzi has solved that dilemma...

This is a photo from Instacart because
my dough is frozen into a weird lump right now.

This dough is so versatile and I can sometimes get 3 small pizza crusts from the one 16-ounce bag. Depending on what I'm using the dough for, I can get a week's worth of snacks and nibbles from one bag. I've made pizza, garlic knots, and some weird-looking little pepperoni and mozzarella monstrosities that look horrible but taste amazing. Here are some recipe ideas from elsewhere.

The best thing is the price: $1.95 for the 16-ounce bag of dough. (Someone on Reddit says they found it for $0.95 so the price might depend on the store location.) Considering the fact that I can get at least 3 personal-sized crusts from one bag, I'm not complaining.

This dough keeps well in the freezer but I find that once you thaw it in the fridge, it's best to use it within a week unless you seal it really well. If I open and don't use a whole bag, I heat-seal the rest in an airtight bag. I usually use the rest of a bag within a couple of weeks at the longest. Also, I can use a whole bag to make garlic knots, freeze them to thaw and bake at my leisure.

Garlic knots
Not only is this dough perfect for pizza and other savory dishes but I've been able to use it with fruit and fruit spreads. I think the best sweet treat I made with the dough was a sort of baked peach rollup. You know, one of the tasty monstrosities I mentioned. I just rolled out the dough, brushed it with a little butter, and sprinkled it with a cinnamon-sugar mix before adding some peaches (small-chopped and well-drained) and rolling up into a log. I brushed the outer crust with a little butter halfway through baking, then sprinkled more of the sprinkle mix on top as soon as it came out of the oven. That was yummy. Next time, I plan to try incorporating some cream cheese into the recipe.

7-in pan pizza
When I'm feeling lazy, I go really simple by making some seasoned strips to nibble on. I roll out some of the dough and cut it into short, narrow strips. I brush the strips with a little EVOO and use whatever seasoning want - usually some Mrs. Dash garlic and herb or whatever and maybe a little sea salt - before I bake them up. I will eat them with a dipping sauce of Prego, Ragu, or whatever tomato-based product is on hand. 

That's what I mean when I say the dough is versatile. Now that I'm regularly doing intermittent fasting and only have so many hours in which to eat, I really like being able to whip up a quick meal. I just make sure that I keep some mozzarella, some pepperoni or ground sausage, and a sauce base around. 

Anyway, I just wanted to post about the dough. It's great for singles or families. Personally, I used to keep eggs and tuna around for quick meals. I'd make eggs and tuna for sandwiches or have eggs with rice or eggs and pancakes or waffles. That was before eggs became so pricey. The last time we were at the store, my brother joked that he was going to buy and raise chickens. At least, I think he was joking.

Well, I have to go move some dough from the freezer to thaw in the fridge. Tomorrow I'm making spinach and mushroom pie.

Peace

--Free

Monday, November 07, 2022

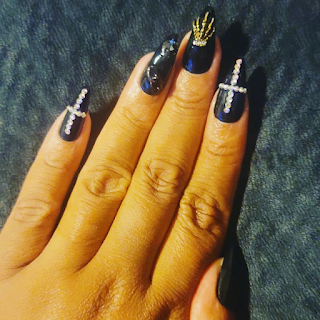
Chrome Gel Nails With Eyeshadow

Because I am now obsessed with doing gel manicures at home, I absolutely wanted to try doing a chrome/shimmer look. The thing is nail powders are so pricey - apparently only because some are called "nail powder"!

As I mentioned in another post, I remembered that I have an old (like 7 or 8 years old) shimmer shadow in a deep copper bronze with a tiny touch of gold. I'm not big on using makeup but I hate to throw out pretty things. Plus, this belonged to my late sister.

This color is so gorgeous, right? 

This is a Sally Hansen brand

I would never be bold enough to wear that color but my sister would. For me, it's a perfect color for chrome nails. And I thought I was such a frugal genius for thinking of this but... the method has been around for a while! See? I'm not the only cheap thrifty gal out here.

Anyway, I learned a couple of things my first time doing this:

  1. Apparently, powder shadow is the best. I'm not sure what happens with sticks or creams or other formats. I don't have any of those around to test.
  2. Because I don't like the way heavy glitter polish felt on my nails (without adding a heavy top coat), I personally recommend using a shimmer-not-glitter powder. Mine is a very fine shimmer powder, thank goodness.
  3. You have to use a base, of course, but you also need to get the powder to stick to your color polish. I did a top coat over the base to apply the eyeshadow and I use a no-wipe top coat so the eyeshadow just slid right off. In the end, I used a color under the powder. Basically, the eyeshadow won't stick to a very slick base. Or at least, it won't hold a lot of the color.
  4. The color your choose to use as a base for the eyeshadow makes a big difference in the final chrome color effect. You'll see what I mean in a moment.
  5. By the way, thankfully, the shadow did not leach onto the brush or into the bottle when I applied the top coat. I was worried about that. And, yes, you need to...
  6. ... finish with a nice top coat. It adds shine, of course, and it seals the eyeshadow from staining things or rubbing off.
  7. Do wipe down your cuticles, fingers, and all your hand with some alcohol or oil. The eyeshadow - because it is a shimmer - was all over my fingers when I finished.
Okay. For my experiment, I used a bronze-gold eyeshadow. For a base color, I used a medium burgundy - except for on one finger where I used my jet black color.
with the burgundy base color
I thought I would prefer the black as a base but, nope, the burgundy base was prettier in my opinion. The black base made the shimmer look much more flat bronze with a green tinge that I don't like at all. The burgundy resulted in a copper bronze that is really pretty and just overall more "chrome-like". The thing is, the base color does come through a little. That's why the black base gave such a different result.  (It was hard to get a good photo because I did the black base on my dominant hand. I had to try to get a photo using my left hand and bad lighting!)

black as a base color on the left finger
Learning about the base color effect is a good thing because I do have gel polish in shades that, by themselves are too light - or too pink or orange or whatever - for my skin tone. The shimmer shadow I have will be great with those as a base. 

I hate my hands because they have always looked old but I love, love, love this chrome polish look on my nails. It's said that wearing perfume and pretty underwear just makes a woman feel more beautiful. I will add having a pretty manicure to that list. And heels. Heels always make me feel pretty.


The main thing I will say about doing a chrome manicure with eyeshadow is that it can be messy. I was prepared. I put down a towel and had plenty of wet wipes and alcohol nearby. But the results are prettier than the photos show. It's well worth the initial mess. I will probably never bother to buy a powder specifically for nails (what kind of ripoff marketing is that?) unless it's cheaper than plain old eyeshadow.

On Amazon, I found lots of shimmer shadows (like this this 5-color palette) from Wet 'n Wild for around $3.20 (around $0.60 per color) and there are some $0.99 single shimmer pans from that brand. Since I'm using them on my nails and not anywhere on my face, I wouldn't mind really cheaping out and finding some Dollar Store palettes. So, go wild and chrome up. Maybe one day, I will try using non-shimmer eyeshadow on my nails.

Peace
--Free


** BTW - as old as that eyeshadow is, I was able to track down that it's a Sally Hansen product. There are still some colors on Amazon but I couldn't find this bronze shade. I did find something that looks identical. Knowing my sister, she didn't pay more than 4 or 5 bucks for the one she bought!

Friday, November 04, 2022

For Gel Nail Newbies (from a gel nail newbie)

 When I posted about using gel nail polish in memory of my late niece, I didn't get into the details.  If you saw my that post, you can tell that my niece was a naturally artistic person. She did her nails herself - even when she used lengthening tips! And she also had beautiful hands...

And steady hands!

See? She was a lefty so her right hand here looks amazing.

Anyway...

This post is all about what I'd tell someone who is trying gel polish for the first time.

You need some basic supplies.

builder gel kit under $10
Because gel polish is nothing like lacquer, you need some things you might not just have in your beauty box. No one told me this and I had to learn as I went so... I recommend having at a minimum:

  • Gel polish - liquid or cream. Color polish is where can stay on a deep budget. (It's the base and top coats where you won't want to totally cheap out! I started with the cheapest but most decent polishes I could find from a couple of well-known brands: Beetles and Modelones. I also got some black polish that I love from the GAOY brand and some jelly polish from Blaico. I really like all of them. I tried and returned a cream palette from Sedbuwza. I found a cream palette from MEFA that is decent. Overall, so far I prefer liquid over cream for opacity and ease of use. (Keep in mind that colors are tricky. What you see on the product page might not be what you get for real. Check reviews because a lot of people post about what the shades look like on actual nails and in home lighting.) BTW, this might help with differences between types of polishes.
  • 100% acetone. Regular polish remover will not work on gel polish. (Here are a dermatologist's tips for
    So cheap at Walmart
    removing with acetone
    .)
  • Cotton balls or cotton pads to use with the acetone. I find that poly balls don't work as well. Cotton balls are the most economical, IMO.
  • Nail files. You need a regular one, one to buff down ridges, one to smooth the top of the nail, and one strong one to file down the top coat of gel polish. Filing down the top layer of gel polish makes it easier to remove the rest with acetone. Or...
  • A peelable base coat. This makes it much easier to remove polish (no filing) and I usually only have to use acetone to clean up any color residue. I also find that this is easier on my nails since I change my color often. (This peelable base is the one I use and really like.)
  • "No-wipe" Base and top coat polish. "No wipe" means not having to wipe the tacky residue of cured polish with alcohol. I just happened to luck out when I bought my base/top coat set and it was the no-wipe kind. NOTE: Even with a polish of so-so quality, the top coat is the main thing, IMO. It will determine shine and set the entire nail. My top coat is excellent.
  • Cuticle oil. Or any good kind of oil to nourish your nails and cuticles. To be honest, it seems that most cuticle oils are made of a combo of oils - safflower, jojoba, flax, etc. I started out using some marula oil and I have used olive oil diluted with grapeseed oil. Don't get caught up in the brands and bottles and cuteness. But you do need to take really good care of your nails. The polish and acetone can be stressing to them.
    No wipe base/top + cuticle oil
  • Brushes. Good gel polish application has a lot to do with the brushes you use. And do NOT get caught up spending a lot of money on brushes made "just for gel". I bought a pack of 7 art brushes for just over two dollars. They came in various sizes and work perfectly. Just make sure the brushes are good. I got these and you might even find some cheaper at a local store. Now, if you get into doing gel "art" stuff, you might need to find finer-sized or specialty brushes.
  • Tin foil or "nail clips". These are for securing the acetone-soaked cotton on your nails long enough to dissolve the gel when removing it. I tried foil and it's awkward and pricey. I got some good (but fairly cheap) clips. It was a good bargain because the kit included some papers, a couple of nail files, and a "cuticle peeler". The peeler is used to peel the dissolved gel from your nails if needed. The papers taught me that I prefer using cotton for the acetone!
    54W for around $10
  • *NOT A NECESSITY* Tape. There is tape used to keep your polish from going onto the sides. I'm a messy manicurist but I am not yet using tape. I can remove any mess with acetone. However, tape looks to be really useful for doing artful stripes and lines on your nails.
  • Sunscreen and lotion. I use sunscreen before using the UV lamp. Also, I am a lotion fanatic when it comes to my body. Now that I am using a UV lamp on my nails, I go heavy on the hand lotion.
  • Patience, patience, and more patience. I have a cheaper UV lamp so it takes a bit longer to completely cure polish. That's fine. That's why I make sure to use sunscreen.

That should get you started before you turn into a complete product junkie!
Of course, I have discovered a couple of things that I wanted to try...
in addition to the basics:
  • 3 coats of Blaico Jelly Gel
    "Jelly" gel colors. Okay. I actually bought my set of jelly polish by accident. I just saw colors I liked and only realized when I got them that they are jelly. Jelly is a milky-looking kind of finish. The color is buildable. There are photos somewhere in this post of how my jelly manicure looked like.
  • Chrome/metallic polish. This is sooo pretty in photos. When I couldn't find a chrome color that I liked, I thought of a gold chrome eyeshadow I have somewhere. Looking it up, I learned that, yes, Virginia, you can use powder eyeshadow on gel nails. So there! (In the very next post, I will discuss my experience using this technique...) 
  • Match your eyes & nails. It's not just chrome shadow that you can use. You can apparently use any kind of powder shadow to color your nails. There are a lot of YouTube how-to videos out there. To be honest, I didn't know that you could use eyeshadow to color with lacquer polish also. 
  • Builder gel. I won't go deep into this until I have used it but... Apparently, this is great for adding shape to your nails and giving them more strength for the length of the manicure. I have flat nail beds and would like more of a curve to the center. I can't wait to see if I can do this using builder gel. You can also use builder gel along with false nail tips to create more length. 
  • Ombre nails just involve using stripes of different colors before using a top coat to kind of blur the lines. Who knew?
Tips, time & and money-savers:
  • Always apply gel polish in coats as thin as you can. Because it doesn't dry without UV light, I find that if I need to, I can use a clean brush to wipe down excess gel before drying. Applying thin coats is really best if you are building color.
  • Wipe any gel off your skin before drying. I have not had problems but I have read reviews where some people do get an itch or irritation. I wrap the tip of a toothpick in cotton and use acetone to remove any gel from my edges and cuticles before drying.
  • Another reason not to get the gel on the edges: when it dries, you have a "lift" piece that makes it too easy to pull the polish loose. (I hope that makes sense!) The gel will peel and lift if you pick at the edges.
  • Know that most people recommend not using lacquer ("regular") polish with gel polish. Some people say that you can do so and some people say that it causes drying problems. My opinion: I use gel because it dries faster and lasts longer so there is no need for lacquer. So far, any colors of polish I like in lacquer, I can find in gel polish. So... up to you.
  • Remember what I said about not getting caught up in labels? Not only can you spend more buying brushes that are labeled as being for gel. The same goes for finding cotton pads and tools. Just look for basic stuff and leave "gel nails" out of the search criteria.
  • Not only can you do powder eyeshadow for chrome/metallic nails, but also look for cheaper brands. It's just because I am cheap that I thought of using my eyeshadow. I realized that it looked exactly like the chrome nail powders. Look for cheap palettes from e.l.f., l.a. colors, Wet 'n Wild, etc. I would even recommend checking the Dollar Store and the sale bins at Walmart for this. I won't put cheap stuff on my skin but I will use them in polish for my nails (which are protected by a base coat).
  • When looking for chrome powders, search for "shimmer" and "metallic" and more things come up. 
  • I personally don't like thick glitter in nail polish. I find that I have to do a heavy top coat to keep the residue from scratching and pulling at fabrics I touch. I recommend looking for eyeshadows with fine glitter - if you are going to use glitter at all.
  • If you buy from Amazon or some other popular online stores, make sure to look for off-site reviews. I like adding "Reddit" to the end of any search. Reviews and feedback on Reddit tend to be a lot more honest and less self-conscious.
  • If you are shopping on Amazon, don't be afraid to look at lesser-known brands. Remember, you can usually return things. (Make sure to read the product's return policy notes!) I did have that fail and return with the cream polish but I turned around and found another small brand item that works fine.
One thing that using gel polish forces me to do more regularly is to take care of my nails. I take better care of my cuticles for sure. 

I hope that this was helpful to the newbies out there. I am having a lot of fun doing my nails - more than when I used slow-drying lacquer. You can get started with the basics for under $35 - and that's cheaper than most visits to a nail salon.

Peace
--Free

P.S.: I recommend starting with cheaper items until you get the hang of applying gel. Just don't skimp too hard on the base and top coats!

Forgive any bad editing. I was working on this over 2 days and changed up some things.


Sunday, October 16, 2022

**HEADS UP** Head & Shoulders Royal Oils

The "Heads Up" posts are going to be for my take on products or ideas without a lot of my usual chatter. First up: Head & Shoulders Royal Oils line of products.

Head & Shoulders was not a brand I ever thought of when thinking of products to care for my naturally nappy hair. That's too bad because this stuff is the truth.

I was looking for a product to soothe my dry scalp when a product popped up in an Amazon product search:


Not only is the product good, but the dispenser nozzle is perfect.

Since I never had a problem with dandruff, I never thought of Head & Shoulders. However, until recently, I never had a problem with a dry scalp so... The product sounded like it might work for me. Also, I was kind of intrigued that Head & Shoulders had jumped on the natural hair care wagon with a "Royal Oils" line. Good name.

The scalp cream worked. I used it in conjunction with my JBCO which was not doing the job by itself. Within a few days, my dry scalp problem was done with. I asked around in some hair care forums about suddenly experiencing a dry scalp. More than a few commenters mentioned that age, climate, and certain styling products could be the reason for my problem. One good suggestion was to try switching up my shampoo and conditioner as they could be the biggest reason.

I normally use a variety of shampoos but for a long time, I have stuck with Aussie Moist conditioners. And maybe it was time for a change because my hair has also been bone dry for a while - ever since I cut it.

Anyway, the H&S scalp cream had worked so well that when I needed to buy conditioner, I got the Royal Oils Moisture Renewal Conditioner. I still had some Aussie shampoo but that conditioner... That stuff is the truth.

My hair has never felt so good both during and after using a conditioner.  Here are the products (if you can find them at your local Dollar General, the prices are much better).


I got the shampoo and conditioner at Walmart for $6.97 each (cheaper than Amazon's $8.56 each); the scalp treatment for $8.57 at Walmart and $8.94 at Amazon; the moisture mask $9.99 for a pack of 10. I didn't see the mask at Walmart plus I ended my Plus membership with them.

Each moisture mask pack gives me 3 treatments because my hair is so short now. For my previous head of hair, I could probably make a packet last for 2 full treatments. It's a thick cream and you have to add a little water or keep your hair very wet for it to work.

I was worried that the 5-ounce bottle of scalp treatment wasn't going to last very long but it's been worth it. I've used it about 3 times a week for 3 weeks as of today and the bottle is just under half full. Not bad.

Right now, I am using a routine with the H&S Royal Oils shampoo, conditioner, scalp treatment, and deep moisture mask. This is in conjunction with the JBCO that I use on my scalp for oil treatment and some Eden BodyWorks leave-in (for dry hair). I will go over the Eden BodyWorks next time.

Our winter weather has started here so my hair is extremely dry. For now, the best of the H&S products, IMO, are the shampoo, conditioner, and scalp treatment. I'm not sure about the moisture mask yet.

Ladies, this stuff is very affordable so it's worth trying out on your nappy naps. Here is the full product line. Make sure that you shop around for the best price.

Peace
--Free

Saturday, September 03, 2022

Clean Smarter (and Cheaper)

This article reminded me of when I learned about the expensive LemiShine products I used for cleaning. I liked the way LemiShine products worked to clean laundry and dishes in spite of the hard water here where I  live. I did not like the prices. When I bothered to read the ingredient lists on each product, I realized the main one was citric acid.

Buying citric acid powder in bulk is much cheaper than purchasing the various LemiShine (and other brands) cleaning products. The powder can be added to water for spraying and cleaning whatever I want. I can use as little or as much of the powder itself as a laundry booster, dishwasher cleaner, or whatever. The two main ways I use the powder? To clean my coffee pots and the mineral deposits around the faucets. I also sprinkle a little into the toilet bowl once a week to soak and flush away that nasty-looking brown line of hard-water stain. 

What I never considered until recently are all the other products I could replace with some basic (and bulk) ingredients. 

Oxi Clean is my go-to alternative to bleach - especially for cleaning clothing. I now know that the main ingredient in that is Sodium Percarbonate. 

So this is just a quickie post to let you know about these base ingredients in case you want to do your own research. I will be on the prowl for more info so that I can keep saving money - and perhaps being a little healthier - when cleaning. 

Here are some links I am going to be checking out:

Peace

--Free

Saturday, August 06, 2022

**REVIEW** Ninja Creami Ice Cream Machine

 So. I found such a good deal on this ice cream matching that I returned the Woot computer. Well, I also returned it because I think Woot had played a little loose with the discount value. It looks to me that they over-estimated the sticker price to make their discount look deeper than it actually was. I decided, no thank you, I will keep looking...

Anyway.

Talk about good timing. The Ninja Creami deal happened during Prime Day.

I use all except
 for the Lite. Lite? No thank you.

Because I have the Amazon Prime Rewards Visa Signature Card, I was able to get the machine for under $140, making 6 no-interest payments. If not for that, I would not have the Creami. (My niece has the Creami but she got the 3-pint model vs the 1-pint I bought and she paid around $235. Yikes. The 1-pint I got on discount is currently $200.) Even when I bought mine with the Prime Day discount, I made up my mind to use what I call my "Keep It or Sleep It" system. It's a simple system. If, after a week or two, I find that I am not getting much use from the appliance, I return it. Very simple. 

This is what my first-week experience was with the Creami:

  • Day 1 - I was still slightly med-sick when it was delivered so it just sat, boxed, in the living room for the morning. I spent half an hour that evening, unboxing it and wondering why the heck I'd bought it in the first place. I took the manual and Quick Start paperwork to bed and watched some video reviews.

  • Day 2 Part 1 - The machine is big and heavy, but not as big and heavy as I'd feared. I have minimal counter space but this fits on my one near the sink. It is too heavy for me to be moving back and forth to a storage spot in the pantry or closet if I use it more than 3 times a week. If I don't use it 3 times a week or more, then I need to "sleep" it. The set-up is super easy because there is nothing to do but plug it in, and attach the blade paddle to the lid. And you don't need to do any of that until you make your ice cream base but we'll get to that.

  • Day 2 Part 2 - I had to decide what I wanted to make. The big thing with the Creami is that you have to make and freeze your base mix for at least 24 hours. This isn't too bad for my niece who had 3 of the pint cups and storage lids. My machine came with a single cup/lid set. That's kind of an important difference. For my first go-round with the machine, I made a modified version of the basic ice cream recipe I saw in the recipe book and online. I can't have a lot of dairy products so I used macadamia milk, a little bit of heavy table cream, natural honey as the sweetener, cornstarch (because of this tip), and vanilla bean paste. I whipped this up, making sure to add as much air as I could, poured it into the pint, lidded it, and put it at the back of my freezer. (I wrote down the time that the mix went into the freezer.)

  • Day 3 Part 1 - It was a couple of hours over the 24-hour limit before I remembered to take out the base mix. For some reason, I was really nervous to actually run the Creami for the first time. I checked and re-checked that I'd correctly (and tightly) attached the paddle/blade to the lid. I practiced inserting putting the pint and bowl together and getting them inserted into the machine. I put the mix back in the freezer and spent an hour watching more videos to make sure I understood the procedure. I spent another hour having a cup of coffee and contemplating whether or not to just send the machine back to Amazon. When the mix had been in the freezer for a total of almost 30 hours, I finally took the plunge. I inserted the bowl, turned on the power, and had a mild anxiety attack when the lights on the machine started doing their thing. I hit Ice Cream and - OH MY LORD! This thing sounds like my vacuum when I've got something stuck in the brush. It's very jarring. Thankfully, the Ice Cream process isn't long - maybe 2 minutes, tops? 
          Okay. That should be all the payback I need to dish out to my loud-assed neighbor upstairs!                   She really gets on my nerves up there, walking like she's trying to wake the dead but... I felt a                 little bad for my other neighbors. (I came up with a solution I will mention shortly.) 

           But - I had ice cream! It was a little bit slushy/icy at first so I did a Re-spin and it was much                     better-looking and it tasted amazing. I was glad that I'd added cream and vanilla paste. 
  • Day 3 Part 2 - I put what was left of my first batch of ice cream into another container to keep in the freezer. I wanted to try making a sorbet. I made a mix of canned peaches (in heavy syrup), some vanilla bean paste, and about a tablespoon of honey. I pureed this with the immersion blender and put it up to freeze. 
  • Day 5 - I had doctor appointments so I did not use the sorbet mix right away. When I did, it was also super-easy. Just hit the Sorbet button on the Creami and let it work. Honestly, I think my sorbet was much better than the ice cream. 
At the end of the 2 weeks, in addition to making the first ice cream and sorbet (I made that twice and shared it with one of my neighbors), I tried my hand at a gelato (without custard), and a completely dairy-free version of ice cream. 

I have to say, my least favorite thing was the dairy-free ice cream. I think ice cream needs more fat. Also, I wasn't using anything in place of the cream cheese.

So. The Creami is definitely a Keep It for me. I went back over the last several months of my Instacart and Walmart receipts to see how much I've spent on non-dairy ice cream. I also thought about the things I've had to replace my ice cream and yogurt cravings with. And I realized how few snack items I can enjoy on this specialized diet. 

This is a keeper FOR ME - however... In my opinion, there are people this might not be for. Unless you can afford even the bargain price - 

  • DON'T get this if you don't have a special diet to stick to - where you need a lot of control or ingredients.
  • DON'T get this if you have more than 3 people in the home who will use it enough. Even with 3 pints and lids, it's tough to satisfy every craving. That 24-hour wait is crazy. As a single person, I was able to deal with this. I can't eat a pint at a time so I made enough over a few days to freeze and nibble on daily. I went ahead and got 2 extra pints and lids ($20) and now can rotate mixes.
  • DON'T get this if you aren't going to use at least 3 of the 7 functions (I'm including the ingredients "Mix In" function to the others) I am using Ice Cream, Sorbet, Gelato, and Smoothie Bowl (this one only once so far).
The pros and cons - again in my opinion:
  • PRO - This is interesting: the design is a modified-for-home-use version of the $7k Pacojet used in industrial & commercial kitchens. And that info is from a pro.
  • PRO - Very useful for people needing ingredient control (especially kids who can't handle sugar or who have allergies).
  • PRO - SO easy to clean. I have been running my parts under warm & soapy water, doing a good rinse, and drying - all by hand. It takes maybe 5 minutes at most.
  • PRO - Easy to set up and use. Even a child (depending) can be taught to use this. It's fairly safe because the blade/paddle is not exposed during use. The blade is not very sharp even when exposed for cleaning.
  • PRO - It doesn't take long to learn how to substitute ingredients to achieve a good taste and texture of the frozen goodies.
  • CON - The machine is loud. So loud. (I did manage to muffle the sound by quite a bit by placing the machine on a piece of thick silicone padding. I even used a thick towel after the first time and that also worked. Just make sure the machine stays level and sturdy - you know, use common sense.)
  • CON - Even for a single person, having only 1 pint is pesky. You cannot set up more than one - or one type of - treat with 1 pint. I now have 3 containers so that I can have treats in rotation or just ready if I want them on the fly. (NOTE: Be careful shopping for extra pints. Go for the Ninja brand. Not all off-brand pints are for use in the machine; some are only for storage.) 
  • CON - No matter how you muffle the sound of the machine, you won't want to run it at night unless you don't share walls/ceilings with neighbors.
  • CON - The price. Unless your circumstances really warrant it, the price is still too high. There are $60 machines out there. I thought about getting one of the bucket-type machines but they have their own drawbacks. Still, you should do comparisons. The other machines are better for making more ice cream (I'm talking gallons) and if you have the space, they would be the better option in my opinion.

I've said this before about the Foodi and it applies to the Creami: if you are going to use this enough and if you can find a really decent discount on the price, yes, it's worth it. Personally, I would never buy something like this if not for finding a good price and no-interest financing. It's good and it's fun but, even for the ingredient control, this wouldn't be worth it on my budget otherwise.

Finally, all this buy-or-not info is just my opinion. You need to do your own research and make your own decision.

Peace
--Free


P.S.: I was writing a blog post on whether or not to keep the Creami when I realized that I had not posted this yet! So I am rush-publishing this, hoping that it doesn't need any editing. If so, mea culpa.